Contributing
Tools, Providers, and Prompts
Tools and Providers
A tool is anything that can operate in a request/reply mode. A provider is anything that can read a resource. Tools typically mean that some processing is performed on the provided input. Providers typically facilitate access to a resource (such as file) without necessarily processing an input (except, of course, evaluating the name of the resource and how that matches with the underlying system storing the resource).
Here are some examples:
- Producing a record to Kafka and waiting for a response in another topic is a tool
- Reading the last record on a Kafka topic is a provider
- Running an SQL query on a database is a tool (i.e., the query is the request, and returned rows are the response).
- Reading a data object in a S3 bucket is a provider
- Exchanging data using request/reply over JMS is a tool
NOTE
This is a generic explanation and the distinction may be specific to the problem domain. Therefore, there may be cases where this doesn't apply.
Tools and resources should be contributed as service templates.
Prompts
A prompt is a reusable template that can leverage multiple tools and provide example interactions for LLMs. Prompts are part of the MCP (Model Context Protocol) specification and enable:
- Creating standardized message templates with variable substitution
- Defining argument schemas for dynamic prompt generation
- Referencing tools that the prompt can utilize
- Supporting multiple content types (text, images, audio, embedded resources)
- Providing example interactions to guide LLM behavior
Prompts in Wanaku are stored and managed through the router's persistence layer and are exposed via the MCP protocol endpoints (prompts/list and prompts/get).
Ideally, most of the MCP tools and MCP resource providers should be created using the Camel Integration Capability for Wanaku.
Authentication Configuration
Using a Static Client

Using Dynamic Client Registration
What the 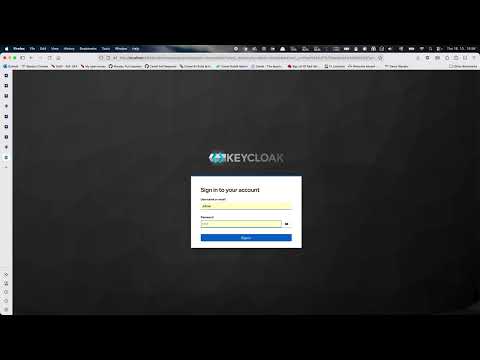 video that shows how to use the MCP Inspector to perform these steps.
Testing
IMPORTANT
When running operator test plans on OpenShift, use a dedicated service account instead of your personal (admin) credentials. See plans/setup/service-account-setup.md in wanaku-tests for instructions.
There are multiple ways you can test Wanaku and the integrations you develop.
- Use the MCP Inspector to test your MCP server, directly and through Wanaku. See Testing MCP servers.
- Use the Admin UI end-to-end tests under
tests/e2e. - Run the integration test suite in wanaku-tests.
- Follow or create test plans in wanaku-tests under
plans/.
Writing Test Plans
Test plans are maintained in wanaku-tests. Follow that project’s instructions for writing and running plans.
Deploying to the Development Environment
These are a couple of examples building the container and pushing to minikube or CRC (CodeReady Containers). If you are deploying to a regular OpenShift cluster, it's pretty similar, you just have to change the image URL.
Building for Minikube
Requirements:
- Minikube must be started.
- Enable the
registryandingressaddon in minikube. - Keycloak already installed and the
wanakuconfiguration is created. - docker
- Set the current namespace to wanaku:
kubectl config set-context --current --namespace=wanaku. kubectlcli.
- Connect to minikube internal registry.
eval $(minikube docker-env)- Build the container image from wanaku-barn-backend and wanaku-operator.
mvn -ntp -Dquarkus.container-image.build=true -Dquarkus.container-image.push=false -DskipTests package -pl :wanaku-operator,:wanaku-barn-backendIf everything went well, you should see the container is pushed to the registry:
[io.quarkus.container.image.jib.deployment.JibProcessor] Created container image quay.io/wanaku/wanaku-barn-backend (sha256:3d3ad35a4c6f3bc04c07388fb52f6b0caabae7d35c8d3cc217f40f589f6bbcd3)Note that as the minikube registry docker is exposed, the image is already available in the registry once the container build finishes. You can look with the cli: docker images --format=table|grep wanaku.
quay.io/wanaku/wanaku-operator            latest         fadfce7976a5   4 hours ago     463MB
quay.io/wanaku/wanaku-barn-backend latest 8cc535c47cad 4 hours ago 535MB- Deploy to Minikube
./deploy/deploy-to-dev-env.shNOTE: You can customize some environment variables:
NAMESPACE: The Kubernetes namespace to install services (default:wanaku)WANAKU_ADMIN_USERNAME: Keycloak admin user (default:admin)WANAKU_ADMIN_PASSWORD: Keycloak admin password (default:admin)WANAKU_INGRESS_HOST: The ingress host (defaultwanaku.$(minikube ip).nip.io})WANAKU_OPERATOR_IMAGE: Wanaku operator image (default:quay.io/wanaku/wanaku-operator:latest)WANAKU_ROUTER_IMAGE: Wanaku router backend image (default:quay.io/wanaku/wanaku-barn-backend:latest)
Building for OpenShift
Requirements:
- OpenShift or CRC must be available.
- podman
- Keycloak already installed and the
wanakuconfiguration is created. - Set the current namespace to wanaku:
kubectl config set-context --current --namespace=wanaku. occli.
- The internal registry should be exposed, assign to REGISTRY environment variable. Check the OpenShift documentation on how to [expose the default registry manually](https://docs.redhat.com/en/documentation/openshift_container_platform/4.18/html/registry/securing-exposing-registry#registry-exposing-default-registry-manually_securing-exposing-registry
REGISTRY="$(kubectl get route/default-route -n openshift-image-registry -o=jsonpath='{.spec.host}')"- Build all container images
mvn -ntp -Dquarkus.container-image.build=true -Dquarkus.container-image.push=true -DskipTests package -Dquarkus.container-image.registry=$REGISTRY -Dquarkus.container-image.insecure=true -Dopenshift -pl :wanaku-operator,:wanaku-barn-backendThe -Dopenshift activates the maven profile to set the quarkus-openshift dependencies.
If everything goes well, you should see the container being pushed to the registry:
[io.quarkus.container.image.jib.deployment.JibProcessor] Pushed container image default-route-openshift-image-registry.apps-crc.testing/wanaku/wanaku-barn-backend (sha256:a5d17a6d1bc1f7f0d2992872d37e5b00b444c9ab567a1ad97303acbb763ae132)- Deploy to OpenShift:
The default image URL is quay.io/wanaku/wanaku-operator:latest set in apps/wanaku-operator/deploy/helm/wanaku-operator/values.yaml, but we should override it with the environment variable WANAKU_OPERATOR_IMAGE, you should get the correct URL from the is/wanaku-operator resource. The default username/password is admin/admin, you can override it with the environment variable WANAKU_ADMIN_USERNAME and WANAKU_ADMIN_PASSWORD.
export WANAKU_OPERATOR_IMAGE=$(oc get is/wanaku-operator  -ojsonpath='{.status.dockerImageRepository}')":latest"
export WANAKU_ROUTER_IMAGE=$(oc get is/wanaku-barn-backend  -ojsonpath='{.status.dockerImageRepository}')":latest"
./deploy/deploy-to-dev-env.sh
The script should print the Keycloak and Wanaku HTTPS URLs at the end:
[INFO]  Keycloak URL:  https://keycloak-wanaku.apps-crc.testing
[INFO]  Wanaku URL  :  https://wanaku-ci-dev-wanaku.apps-crc.testing
Release Guide
Committers should check the Release Guide for details about how to build and distribute Wanaku.
Learn More
To contribute new core features and connectors, also read the Wanaku MCP Router Internals guide.
If you want to understand what each of the components do, then read the Wanaku Components and Architecture guide.
Pages in this section
- Building: build and package the project from source.
- Write documentation: the page conventions and the docs checks that CI runs.
- Testing: the Wanaku assertions library for tests.
- Testing MCP servers: test MCP servers locally and in integration tests.
- Test plans: where the test plans for humans and AI agents live.
- Release guide: how to cut a release.
- Release checklist: the multi-repository release steps.
- Internals: what the Barn backend provides and how Wanaku uses it.
- Persistence internals: the persistence layer of the Barn backend.